2013/03/30

非 ascii code 網址問題

今天收信有人回報 xgallery 有問題, 無法使用.
檢查並且測試一下對方所給的網址, 發現原來是網址的問題

一般正常的網址大概如下, 用正常 HttpURLConnection 一切都沒問題.
http://www.yahoo.com

但是如果是以下的網址呢 ?
http://www.yahoo.com/abcabc재/test/123.html
用一般正常的瀏覽器看是沒有問題, 但如果使用 HttpURLConnection 就會出現找不到網址的現象.
原因很簡單, 就是要把網址 encode.

原本很簡單的我就直接使用 URLEncode("http://www.yahoo.com/abcabc재/test/123.html", "UTF-8"),
這樣不行, 這樣會連 ":", "/" 等都給 encode 起來, 所以只能一個一個去 encode.

解決方式如下:

public static String getEncodeURL(String url) {
 StringBuilder sb = new StringBuilder();
 Uri uri = Uri.parse(url);
 
 String path = uri.getPath();
 List paths = uri.getPathSegments();
 
 int index = url.indexOf(path);
 
 sb.append(url.substring(0, index));
 for (String s: paths) {
  try {
   sb.append("/"+URLEncoder.encode(s, "UTF-8"));
  } catch (UnsupportedEncodingException e) {
   sb.append("/"+s);
  }
 }
 return sb.toString();
}

只要把每個網址用這個 method 包起來就可以了

PS: 上面那個 </string> 請忽略, 不知道為啥會出現

2013/03/29

論壇瀏覽器 v2.0.1

** 由於無法每個論壇都測試, 有問題請回報連結跟論壇, Thanks **

* 修改加入書籤錯誤的問題
* 修改部份論壇顯示錯誤的問題
* 修改部份論壇連結點擊後會導致 FC 的問題
* 修改按 Back key 時會重載入的問題
* 支援以下論壇感謝的動作

> ck101
> FastZone
> FDZone
> p2p101

剛上傳, 所以 google play store 通常會 delay 一下.
Google play store: http://goo.gl/jdHf5

2013/03/20

`docdir' is not a legitimate directory for `SCRIPTS'

今天在重新 checkout 一份 source code, 準備編譯時出現這個問題.
由於電腦之前硬碟掛掉, 所以編譯環境有所改變, 所以在懷疑是不是重新安裝過程出了問題.

Google 了一下, 終於找到解決問題方法.


原因是 automake 會限制 docdir 的位置, 如果不符合就會出現問題.
但如果想要強制放置在自己所設定的位置, 可以透過一些方式而繞過這個問題.

下面這是會出現 `docdir' is not a legitimate directory for `SCRIPTS'
# This was added at the suggestion of libtoolize
ACLOCAL_AMFLAGS = -I m4

#
# set doc (keyword) directory
#
docdir = $(prefix)/doc
#
# Documents list
#
doc_SCRIPTS = 

CLEANFILES = $(doc_SCRIPTS)
EXTRA_DIST = $(doc_SCRIPTS)


修改方式如下
# This was added at the suggestion of libtoolize
ACLOCAL_AMFLAGS = -I m4

#
# set doc (keyword) directory
#
docdir = $(prefix)/doc
mydocdir = $(docdir)
#
# Documents list
#
mydoc_SCRIPTS = 

CLEANFILES = $(doc_SCRIPTS)
EXTRA_DIST = $(doc_SCRIPTS)


就是這樣簡單.


參考來源:
To prevent the use from using incorrect locations by mistake -- it usually
makes bi sense to install a program in $(docdir) or a library in $(bindir).

But if the user still want to use those location (because he has his
own good reasons hopefully), he can easily circumvent our checks:

  mydocdir = $(docdir)
  mydoc_LIBRARIES = libfoo.a  # Will be installed in docdir.

This is also documented in the manual ("The Uniform Naming Scheme").


http://gnu-automake.7480.n7.nabble.com/limited-install-locations-for-scripts-td5453.html

PostCrossingBot v1.0.0

PostCrossingBot is a ad-supported android client for postcrossing.

Right now, You must be a member of postcrossing to use this app.

It has the following features:

* easy way to navigate, view users profile, statistics.
* viewing postcards with zooming/panning support.

There are some features still working on.
Here are my todo lists.

TODO:
* Edit account profile.
* Send a postcard
* Register a postcard

If you have any suggestions or questions, feel free to email me to weakapp@gmail.com

Google Play: http://goo.gl/4teOO


Screenshot:


2013/03/17

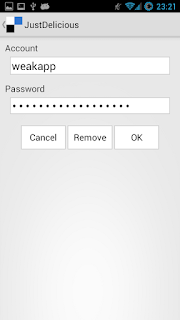
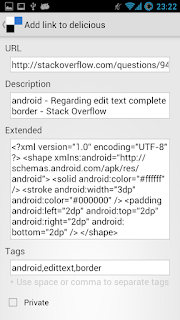
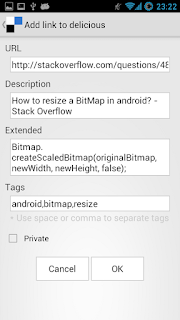
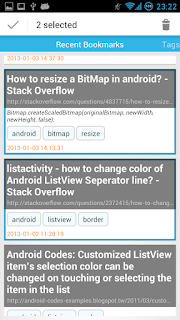
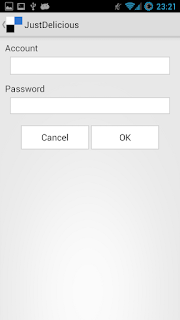
JustDelicious v1.0.0 (Free Version)

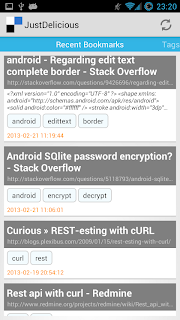
JustDelicious Free is an ad-supported delicious.com client with following features:

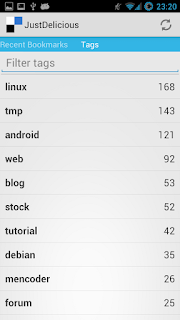
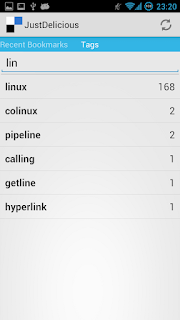
* Swpie to swich from recent post links to tag view
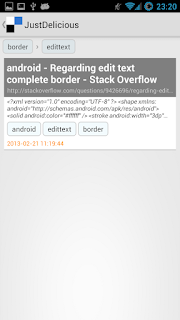
* In post links, clicking tag can filter the links
* Rename or remove tags
* Remove post links
* Add links from other apps such as browser, youtube ...
* Multi-account support
* Long press to select post links or tags to edit or remove.


Instructions:

* create an account
1. First press menu key and select Accounts to add account or choose account
2. After choose account, press refresh icon to synchronize bookmarks

* edit or remove an account
1. press menu key, choose account and press edit button.
2. you can remove it or edit this account.


If you have any problems or questions, feel free to mail to me weakapp@gmail.com


Google play: http://goo.gl/EFDft


changelog:
v 1.0.0
* add / remove links.
* basic supports.


2013/03/11

論壇瀏覽器 v1.0.4

v 1.0.4 -
* 增加 Gphonefans.net 的支援
* 增加書籤功能
* 修正部份 p2p101 連結錯誤的問題

Google play store: http://goo.gl/jdHf5

2013/03/09

XGallery v1.0.2

XGallery is a Gallery 3 (http://galleryproject.org/) client for Android.

Main Features:
- Add play video by using external app
- Add images or video download
- Add share images or links to other app
- Multiple gallery account supported
- Browser, upload and delete images
- Zoom/Pan images
- Uploading of single or multiple images

Requirements:
- REST API Module must be enabled (Gallery > Administration > Modules > REST API Module)

Note:
* It is optimized for phone not tablet.


PLEASE e-mail me at weakapp@gmail.com if you have any problem.


中文說明


Changelog:

v 1.0.2
* Fix in some cases, it will FC.
* Add video icon when viewing images, tap icon can launch external app to play video.

v 1.0.1
* Add play video by using external app
* Add images or video download
* Add share images or links to other app
* Fix some performance issues.


XGallery 是 Gallery3 (http://galleryproject.org/) 的客戶端.

主要功能:
- 新增線上播放影片 (手機上必須有其他支援的 app)
- 新增相片以及影片下載
- 新增相片或者相片連結的分享
- 支援多組 Gallery3 的帳戶
- 可瀏覽, 上傳或者刪除相簿, 相本或者影片 (影片不支援上傳)
- 支援線上瀏覽圖片, 可放大縮小
- 支援上傳單一或多個相片

需求:
- 使用此軟體必須開啟 REST API 模組
(Gallery > Administration > Modules > REST API Module)

注意:
* 本軟體目前只針對手機最佳化


如果有任何問題, 請來信 weakapp@gmail.com.

Changelog:

v 1.0.2
* Fix in some cases, it will FC.
* Add video icon when viewing images, tap icon can launch external app to play video.

v 1.0.1
* 新增線上播放影片 (手機上必須有其他支援的 app)
* 新增相片以及影片下載
* 新增相片或者相片連結的分享
* 修正部份笑能上的問題

論壇瀏覽器 (ForumReader) v1.0.3

討論區閱讀器 (Forum Reader) 這是一個方便大家閱讀使用 discuz 所架設的討論區的軟體.
讓你可以用手機或者平板 (支援度比較差) 輕鬆的瀏覽論壇.

目前支援論壇:
Apk
Ck101
FDZone
FastZone
P2p101
Eyny

PS: 如有論壇管理者不希望被加入支援, 請來信告知.
PS: Eyny 速度上比較慢, 所以載入會比較久一點

注意:
- 本軟體目前只對手機支援度比較好
- 本軟體目前指支援瀏覽, 下載附件之類還未支援
- 本軟體目前尚未支援個人資訊顯示


簡單使用方式:
** 除了 Fastzone 必須登入才能瀏覽以外, 其他預設都是不登入, 如果要登入瀏覽, 請記得先登入. **

* 如何登入 ?
> 論壇右邊圖示, 即可進入登入選單

* 如何加入書籤
> 長按連結, 選擇加入書籤, 輸入此連結的簡單描述(可以省略)


Changelog:
v 1.0.3 -
* 修正 CK101 類別重複的問題
* 修正部份 CK101 內文無法觀看的問題
* 增加安全提問的輸入

v 1.0.2 -
* 增加論壇支援
* 修改部份論壇讀取的問題
* 修改部份錯誤
* 增加記憶密碼, 使用者可以選擇是否儲存 (密碼會編碼儲存)

v 1.0.1 -
* 基本論壇登入


2013/03/08

"failed to retrieve account information" ????

今天突然興起想要把 Xoom 上面的照片傳到 picasa,結果竟然發現沒辦法傳,
而是出現了 "failed to retrieve account information" 的訊息。
Google 了一下,原來是 Dropbox 導致。
而這只會發生在 Dropbox Account 跟你的 google Account 一樣。
幸好 Dropbox 允許改變自己的信箱,所以把 Dropbox 的信箱更新一下。
(當然所有需要sync的也都要改用新帳號)


在測試一下,就沒問題了!

參考網址:
http://code.google.com/p/android/issues/detail?id=18340

Basic ExpandableListView

最近做了一個 app 而使用到 ExpandableListView, 這邊就紀錄下來如何使用.

下面是我的主 layout, 很簡單就只是一個 ExpandableListView 的 widiget.

activity_main.xml


ExpandableListView 有分 Group 和 Child, 因此分別對 Group 和 Child 設定各自的 View.

group_row.xml


child_row.xml


接下來就是主要程式的部份, 這邊我不使用 ExpandableListActivity, 原因是
在很多情況下直接繼承 (extend) ExpandableListActivity 是沒辦法, 比方說當你要使用 Fragment 的時候.
這邊為了簡化, 所以所有的 import 都不會列出來.

因為會使用到 ExpandableListView 這元件, 所以我們特別使用一個變數 (mExpandableListView) 來指向此元件.


public class MainActivity extends Activity {
 private ExpandableListView mExpandableListView = null;

 @Override
 protected void onCreate(Bundle savedInstanceState) {
  super.onCreate(savedInstanceState);
  setContentView(R.layout.activity_main);

  mExpandableListView = (ExpandableListView) findViewById(R.id.elistview);

  initData();
 }
}
有了 ExpandableListView 元件, 接著必須把所需的資料放進此元件.
groupItems 使主要的群組, 而 childItems 是每個群組底下的資料
跟 ListView 一樣, 這邊定義一個 MyExpandListAdapter 來給 ExpandableListView 使用.
MyExpandListAdapter 會包含我們如何顯示每個行(row)資料和呈現的畫面.


private void initData() {
 final String[] groupItems = { "Group1", "Group2", "Group3", "Group4", "Group5", };
 final String[] childItems = { "Child1", "Child2", "Child3", "Child4", "Child5", };

 MyExpandListAdapter adapter = new MyExpandListAdapter(this, groupItems);

 int i = 0;
 int count = groupItems.length;
 
 /**
  * add child data to groups
  */
 for (i = 0; i < count; i++) {
  adapter.addChild(i, childItems);
 }
 mExpandableListView.setAdapter(adapter);
}
MyExpandListAdapter 比較複雜, 因為這個主要是用來顯示資料並且在 ExpandableListView 裡的畫面呈現.


class MyExpandListAdapter extends BaseExpandableListAdapter {

 Context ctxt = null;

 /**
  * Use SparseArray to store my group-child mapping datas,
  */
 SparseArray data = new SparseArray();
 
 String[] groups = null;

 public MyExpandListAdapter(Context c, String[] groupitems) {
  super();
  ctxt = c;
  groups = groupitems;
 }

 @Override
 public String getChild(int groupPosition, int childPosition) {
  String[] childs = data.get(groupPosition);
  if (childs == null) {
   return null;
  }
  if (childPosition >= childs.length) {
   return null;
  }
  return childs[childPosition];
 }

 @Override
 public long getChildId(int groupPosition, int childPosition) {
  return childPosition;
 }

 @Override
 public View getChildView(int groupPosition, int childPosition,
   boolean isLastChild, View convertView, ViewGroup parent) {
  /**
   * in this function, we can customize our child view and show data.
   */

  View row = convertView;
  if (row == null) {
   LayoutInflater inflater = (LayoutInflater) ctxt
     .getSystemService(Context.LAYOUT_INFLATER_SERVICE);
   row = inflater.inflate(R.layout.child_row, parent, false);
  }

  TextView tv = (TextView) row.findViewById(R.id.childlabel);

  String child = getChild(groupPosition, childPosition);

  if (child != null) {
   tv.setText(child);
  }

  return row;
 }

 @Override
 public int getChildrenCount(int groupPosition) {
  String[] childs = data.get(groupPosition);
  if (childs == null) {
   return 0;
  }
  return childs.length;
 }

 @Override
 public String getGroup(int groupPosition) {
  if (groupPosition >= groups.length) {
   return null;
  }
  return groups[groupPosition];
 }

 @Override
 public int getGroupCount() {
  return groups.length;
 }

 @Override
 public long getGroupId(int groupPosition) {
  return groupPosition;
 }

 @Override
 public View getGroupView(int groupPosition, boolean isExpanded,
   View convertView, ViewGroup parent) {
  /**
   * in this function, we can customize our group view and show data.
   */

  View row = convertView;
  if (row == null) {
   LayoutInflater inflater = (LayoutInflater) ctxt
     .getSystemService(Context.LAYOUT_INFLATER_SERVICE);
   row = inflater.inflate(R.layout.group_row, parent, false);
  }

  TextView tv = (TextView) row.findViewById(R.id.grouplabel);

  String group = getGroup(groupPosition);

  if (group != null) {
   tv.setText(group);
  }

  return row;
 }

 @Override
 public boolean hasStableIds() {
  return false;
 }

 @Override
 public boolean isChildSelectable(int groupPosition, int childPosition) {
  /**
   * If set to false, we can't click child item.
   */
  return false;
 }
 
 public void addChild(int group, String[] childs) {
  /**
   * Add this function for us to add childs.
   * It will overwrite previsou data
   * But this is just an example.
   */
  data.put(group, childs);
  notifyDataSetChanged();
 }
}
這樣就是基本的 ExpandListView 了. 以下是畫面呈現,
如果注意到的話, 群組的折疊圖示竟然重疊了.
修改一下 group_row 的 layout
Screenshot from 2013-03-08 14:07:22


修改後的結果如下
Screenshot from 2013-03-08 14:19:45

不過一般通常折疊的圖示都是在右邊, 所以再次修改一下把折疊圖示移到最右邊.


private void initData() {
 final String[] groupItems = { "Group1", "Group2", "Group3", "Group4", "Group5", };
 final String[] childItems = { "Child1", "Child2", "Child3", "Child4", "Child5", };
 MyExpandListAdapter adapter = new MyExpandListAdapter(this, groupItems);

 int i = 0;
 int count = groupItems.length;
 
 /**
  * add child data to groups
  */
 for (i = 0; i < count; i++) {
  adapter.addChild(i, childItems);
 }
 
 setIndicatorToRight();
 mExpandableListView.setAdapter(adapter);

 
 mExpandableListView.setOnChildClickListener(new OnChildClickListener() {
  @Override
  public boolean onChildClick(ExpandableListView parent, View v,
    int groupPosition, int childPosition, long id) {

   MyExpandListAdapter adapter = (MyExpandListAdapter) parent
     .getAdapter();

   String group = adapter.getGroup(groupPosition);
   String child = adapter.getChild(groupPosition, childPosition);

   Toast.makeText(MainActivity.this, group + " - " + child,
     Toast.LENGTH_SHORT).show();

   return true;
  }
 });
}

private void setIndicatorToRight() {
 final float scale = getResources().getDisplayMetrics().density;
 
 /**
  * Calcaulate device screen width in pixel
  */
 DisplayMetrics metrics = new DisplayMetrics();
    getWindowManager().getDefaultDisplay().getMetrics(metrics);
    int width = metrics.widthPixels;
    
    mExpandableListView.setIndicatorBounds(width - (int)(50 * scale), 
      width - (int)(10 * scale));
}
下面就是最終畫面的呈現

Screenshot from 2013-03-08 14:33:31

原始碼下載: here

Sync cookie 到 webview

Webview 可以用來呈現網頁畫面, 其中最簡單的使用方式就是 loadUrl 這個 function. 一般網站可以不考慮到 cookie, 但如果牽扯到需要登入時, cookie 就很重要了. 如果單純使用 webview, 那 cookie 就不是問題, 但如果想要用 HttpURLConnection 這類別, 並且透過此類別做動作, 那麼要如何把所得到的 cookies 分享給 webview 使用 ? 以下就是 sync cookie 的方式.
android.webkit.CookieManager cookieManager = android.webkit.CookieManager.getInstance();

/** remove all cookies **/
cookieManager.removeAllCookie();
cookieManager.removeSessionCookie();
cookieManager.removeExpiredCookie();
/** Yes, we accept cookies **/
cookieManager.setAcceptCookie(true); 

StringBuilder sb = null;

for (HttpCookie cookie: cookies) {
 sb = new StringBuilder();
 if (cookie.getDomain() == null) {
  continue;
 }
 sb.append(cookie.getName() + "=" + cookie.getValue());
 sb.append("; domain=" + cookie.getDomain());
 cookieManager.setCookie(cookie.getDomain(), sb.toString());
}
cookieSyncManager.getInstance().sync();  

Android 全螢幕切換

Android 全螢幕切換, 可透掛以下方式達成.
private void toggleFullscreen() {
 WindowManager.LayoutParams attrs = getWindow().getAttributes();
 
 if ((attrs.flags & WindowManager.LayoutParams.FLAG_FULLSCREEN) == WindowManager.LayoutParams.FLAG_FULLSCREEN) {
  attrs.flags &= ~WindowManager.LayoutParams.FLAG_FULLSCREEN;
 } else {
  attrs.flags |= WindowManager.LayoutParams.FLAG_FULLSCREEN;
 }
 getWindow().setAttributes(attrs); 
}

使用 HttpURLConnection Post

使用 HttpURLConnection 做 Post 基本上很簡單, 可以透過以下方式達成, 以下都沒有做 Exception 或者 Error 處理.
StringBuilder uriparameters = new StringBuilder();
uriparameters.append("user=" + URLEncoder.encode(user, "UTF-8"));
uriparameters.append("&password="+ URLEncoder.encode(pass, "UTF-8"));
int parameterLen = uriparameters.length();
/** sURL 是想要 post 的網址 **/
URL url = new URL(sURL);
HttpURLConnection conn = null;
conn = (HttpURLConnection) url.openConnection();

/** 假裝成瀏覽器 **/
conn.setRequestProperty(
  "User-Agent",
  "Mozilla/5.0 (X11; Linux x86_64) AppleWebKit/537.11 (KHTML, like Gecko) Chrome/23.0.1271.91 Safari/537.11");
conn.setConnectTimeout(15000);
conn.setReadTimeout(15000);
conn.setRequestMethod("POST");

conn.setRequestProperty("X-Gallery-Request-Method", "post");
conn.setRequestProperty("Content-Type", "application/x-www-form-urlencoded");
conn.setRequestProperty("Content-Length", Integer.toString(paramsLen));

conn.setDoOutput(true);
conn.setDoInput(true);

DataOutputStream wr = null;
wr = new DataOutputStream(conn.getOutputStream());
wr.writeBytes(uriparameters.toString());
wr.flush();
wr.close();
wr = null;
/** 取得 post 後所得到的 response **/
InputStream in = conn.getInputStream();
但是萬一是要上傳檔案呢 ? 這就不是這麼簡單了, 但是一樣可以用類似的方式達成我們的目的. 其實主要就是我們必須要自己去把整個post body 自己寫上去, 如果不知道怎麼寫, 簡單方式就是透過 wireshark 抓取自己透過瀏覽器上傳的封包, 接著再把封包內容寫上去這樣就好了.
final String POST_CRLF    = "\r\n";
final String POST_TWO_HYPHENS  = "--";
final String POST_BOUNDARY   =  "*****";
final String POST_UPLOAD          = POST_TWO_HYPHENS+POST_BOUNDARY+POST_CRLF;
final String POST_UPLOAD_END   = POST_CRLF+POST_TWO_HYPHENS+POST_BOUNDARY+POST_TWO_HYPHENS+POST_CRLF;

URL url = new URL(sURL);
HttpURLConnection conn = null;
conn = (HttpURLConnection) url.openConnection();

conn.setRequestProperty(
  "User-Agent",
  "Mozilla/5.0 (X11; Linux x86_64) AppleWebKit/537.11 (KHTML, like Gecko) Chrome/23.0.1271.91 Safari/537.11");
conn.setConnectTimeout(15000);
conn.setReadTimeout(15000);
conn.setUseCaches(false);
conn.setRequestMethod("POST");
conn.setRequestProperty("X-Gallery-Request-Method", "post");
conn.setRequestProperty("Connection", "Keep-Alive");
conn.setRequestProperty("Cache-Control", "no-cache");
conn.setRequestProperty("Content-Type", "multipart/form-data;boundary=" + Const.POST_BOUNDARY);


conn.setDoOutput(true);
conn.setDoInput(true);

DataOutputStream wr = new DataOutputStream(conn.getOutputStream());

wr.writeBytes(Const.POST_UPLOAD);
wr.writeBytes("Content-Disposition: form-data; name=\"file\"; filename=\"");
wr.write(f.getName().getBytes("UTF-8"));
wr.writeBytes("\"" + Const.POST_CRLF);
wr.writeBytes("Content-Type: application/octet-stream" + Const.POST_CRLF);
wr.writeBytes(Const.POST_CRLF);

BufferedInputStream bin = new BufferedInputStream(fin);
byte[] rdata = new byte[4096];
int count = 0;
/** total upload length **/
int ulen = 0;

while ((count = bin.read(rdata)) != -1) {
 ulen += count;
 wr.write(rdata, 0, count);
}
wr.writeBytes(Const.POST_UPLOAD_END);
wr.flush();
wr.close();
wr = null;

InputStrem in = conn.getInputStream();